When you are riding on Zwift and take a screenshot with your keyboard or Zwift Mobile Link (ZML), it may end up becoming visible in your Strava activity.
If you don't know how to take a screenshot using the keyboard or ZML, that's covered in another KB article:
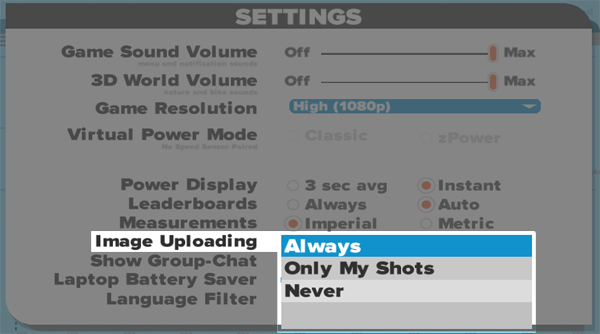
Depending on your particular Zwift settings, Zwift can be permitted to take its own screenshots, or you can take them yourself, overriding the 'automatic' screenshots Zwift may take. You can also disable them altogether:
Your screenshots will be saved in your \Pictures\Zwift folder on your Zwift machine, whether it be a PC, Mac and in your Camera Roll on your iOS device. These "clean" screenshots will have a _clean postfix in the filename, such as: 2015-04-29_1947440_clean.jpg.
The first screenshot taken by Zwift itself is taken without any "HUD" (Heads-Up Display) panels on the screen, so it will appear clean and bare, like the example shown here:

When you look at your uploaded Strava activity, you'll see this one, single screenshot there in your event.
But you may want to take more screenshots, or take those perfectly-timed screenshots when you cross the line first in a race event, and include those in your public Strava profile. Those screenshots will contain your ride data, times, laps, leaderboards, rider list and other on-screen elements.
There's a limitation of how this works with Strava, and many have complained they want this expanded to include support for attaching images from a desktop web browser. So far, Strava has been resistant to add this capability into the core Strava feature set. For now, you can only attach supplemental photos and screenshots to your Strava activity from the Strava app on your mobile device.
To add more screenshots, you'll need to put them somewhere that your mobile device can get to them, using a tool like Dropbox, Google Drive, Box or another tool. Once those images are accessible via your mobile device, load up Strava and select your specific ride activity.
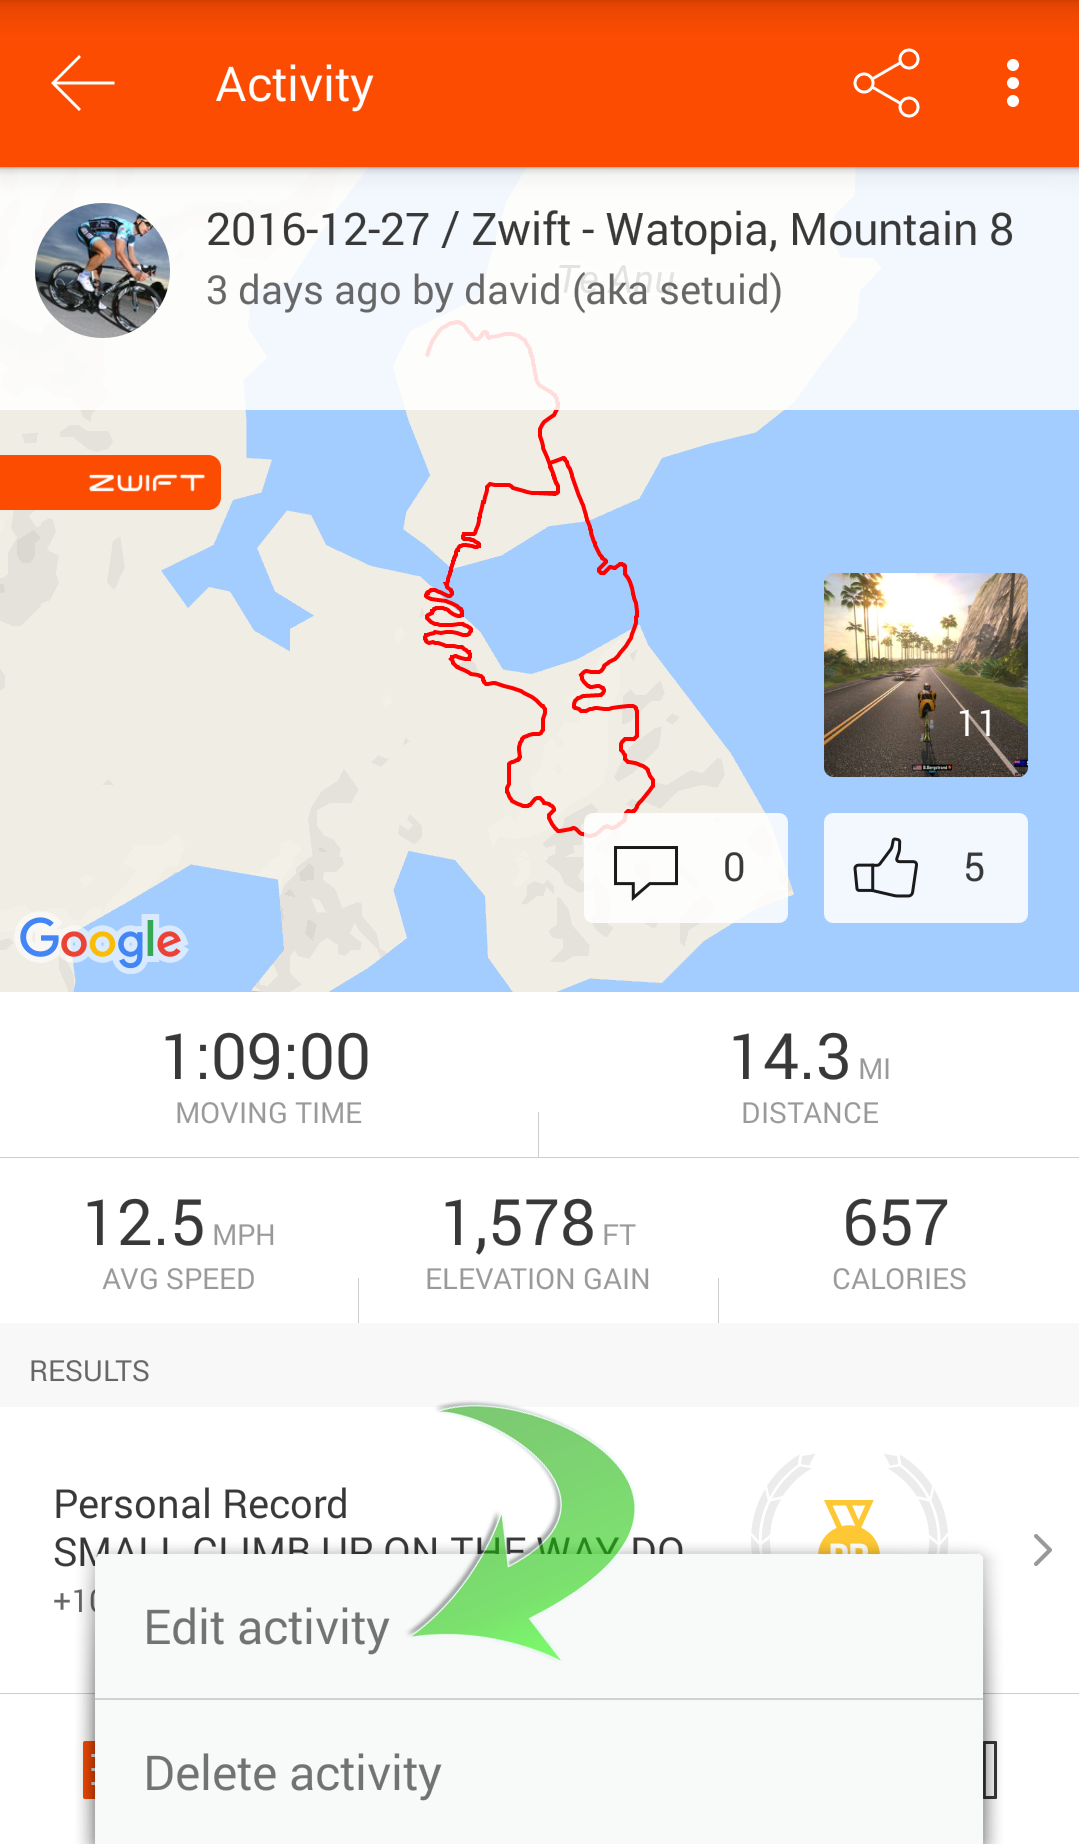
Once there, you should have a menu option or button to edit your Strava activity. Here's how it looks on my Android device:
On an iOS device such as an iPad, the "Edit" button is located in the upper-right corner of the screen.
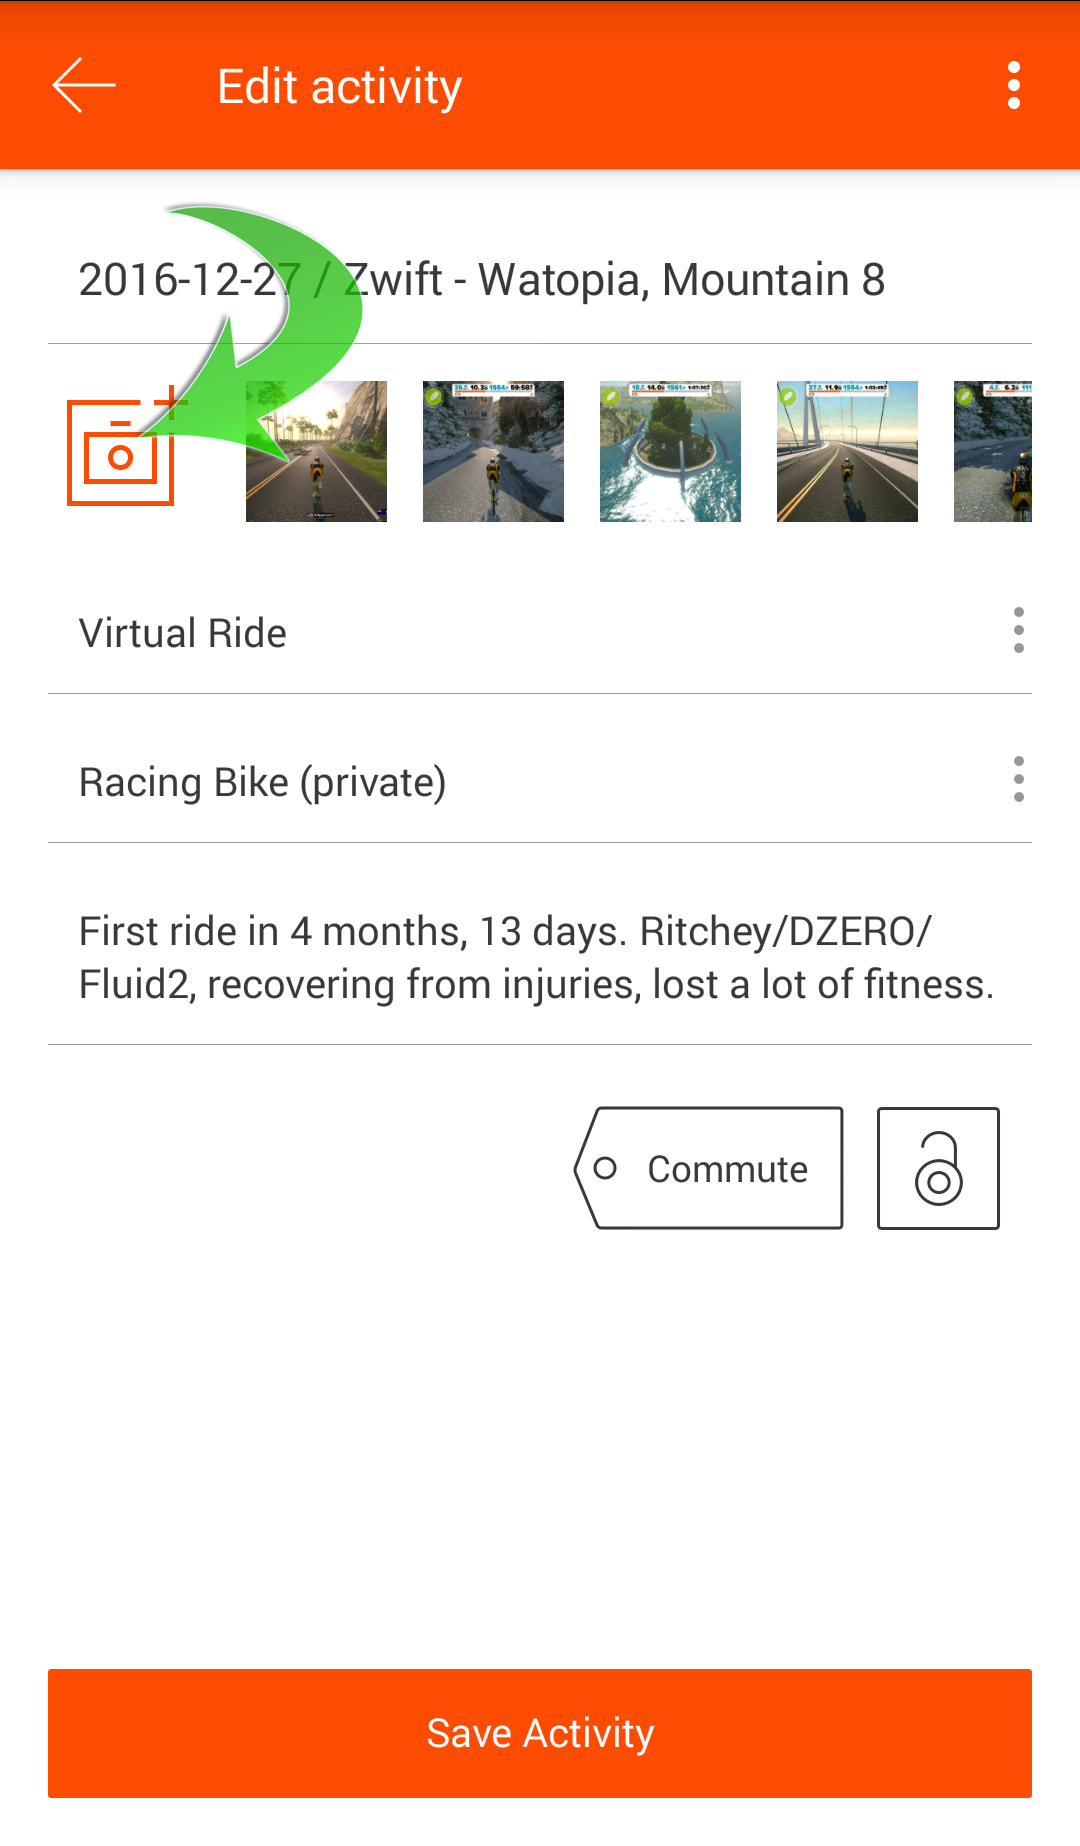
When you choose "Edit activity" the activity, you'll be presented with a different screen, where you can then tap the [+] button to add additional images. On your mobile device, browse to where your custom screenshots or images are and choose them one at a time.
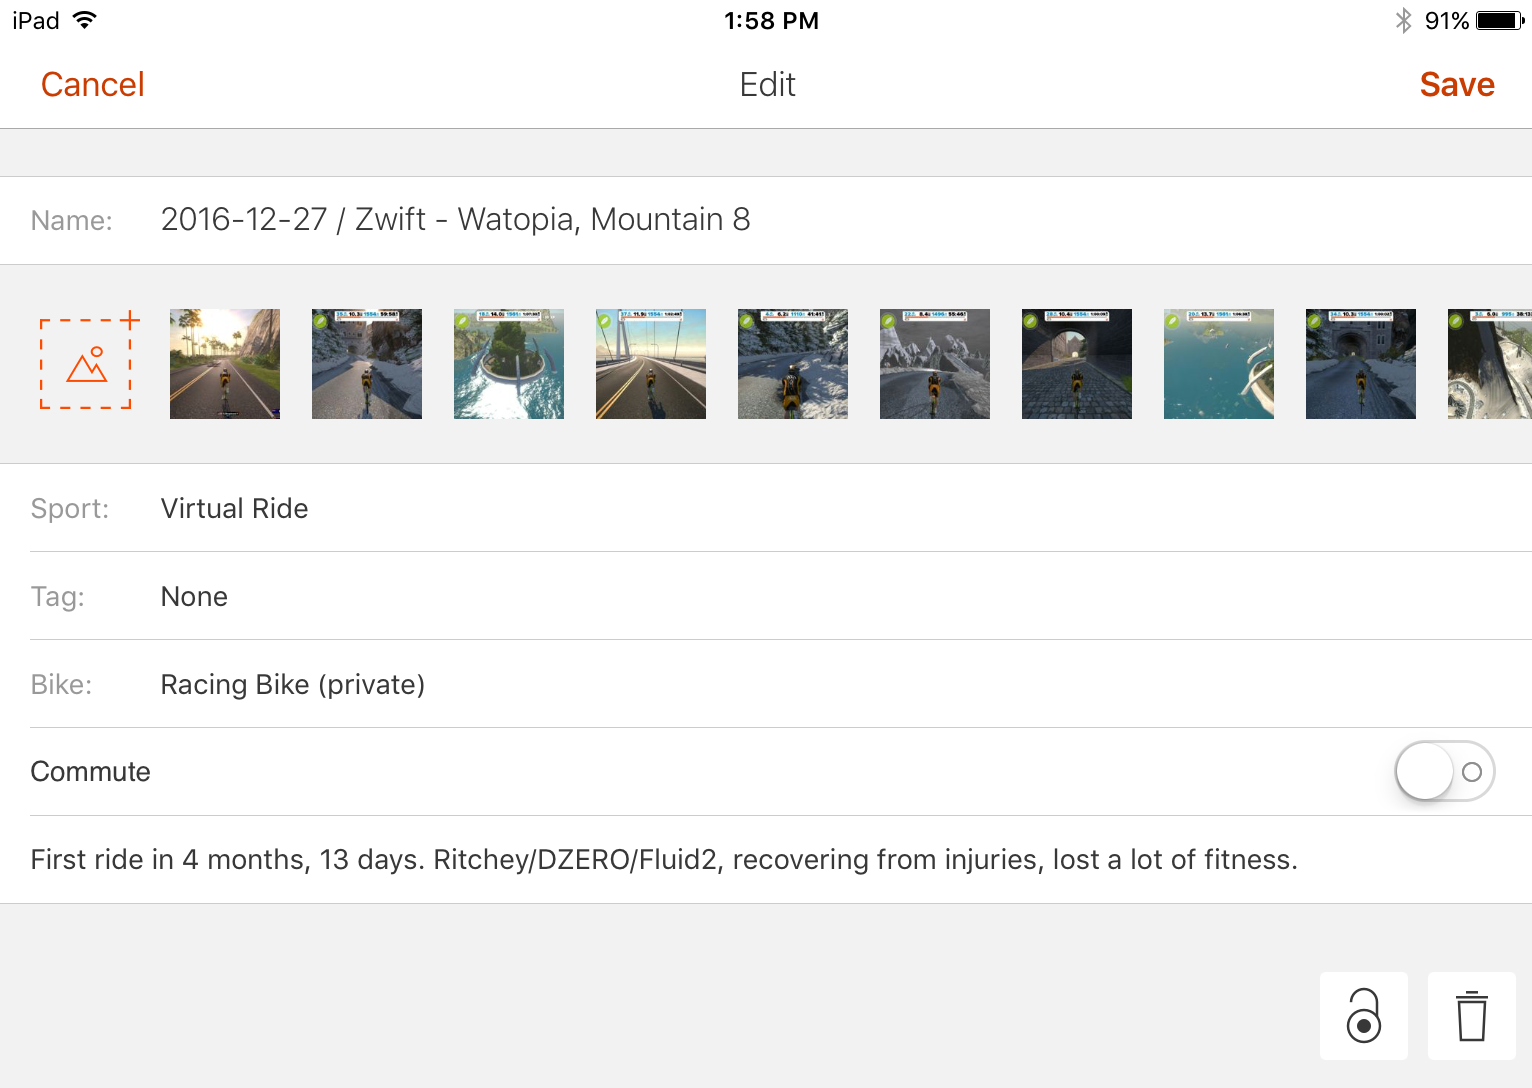
Selecting one of the existing images your Strava activity will allow you to add a custom image caption, remove or replace that image.
At the bottom, when you select "Save Activity", those images will then be posted to your profile and saved within your Strava activity.
That's all there is to it! Now get out there, ride and showcase those amazing screenshots with the rest of the world!
- Printer-friendly version
- Log in to post comments
- 35328 views