For those of us who like to do longer, multi-hour rides, it's sometimes necessary to be able to consume other content in addition to Zwift, as well as consume our necessary nutrients on the bike/treadmill.
This content can come in the form of music through Pandora, Spotify, Amazon Music or a dedicated music player, but it can also take the form of video content from Amazon Prime Video, Netflix, Hulu, Vudu and other platforms. I personally consume a mountain of technology training materials while I'm on the bike, in addition to catching up on my favorite movies and TV series'. I find it a great way to force myself to stay distraction-free while I fill my brain with new material.
If you're using a single monitor or projector with Zwift, you have plenty of additional real-estate for displaying multiple types of content simultaneously. I recently wrote another KB article describing how to use "FancyZones" in the Microsoft PowerToys collection to set up quadrants of your screen where apps get launched and resized automagically. There are equivalent solutions for macOS also linked in the article below.
That solution works exceptionally well for the full application itself, but that sometimes includes the application window frames, title bars and other content which eats into your usable area of the screen for your Zwift and shared media sessions.
There's a neat ProTip I stumbled on, almost by accident as I was reaching for my mouse and keyboard on my RAD Cycling desk while riding and it slid forward away from me as I bumped it.
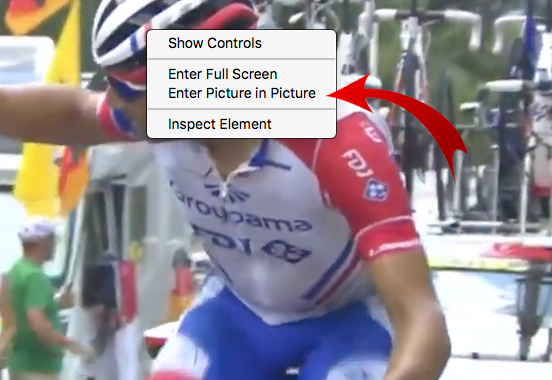
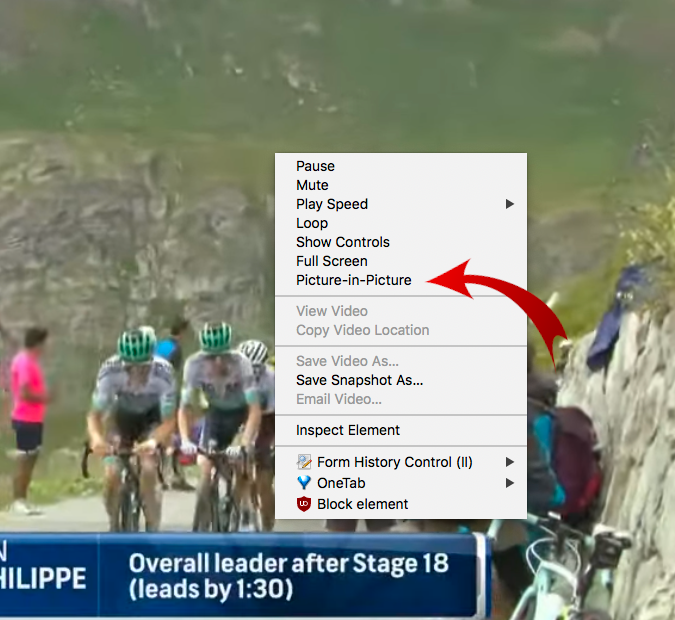
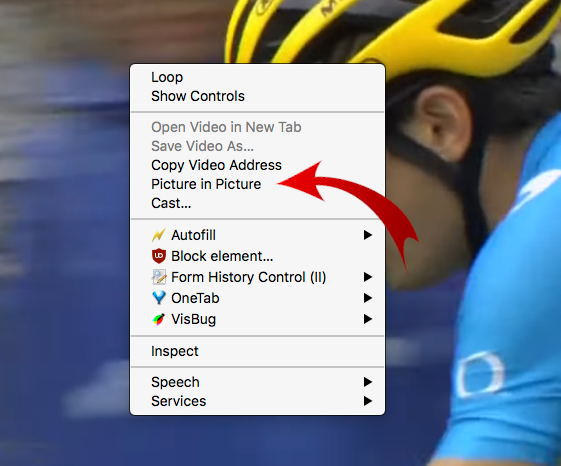
If you're watching a video in YouTube, and this is exclusive to YouTube for the moment (more on this in a moment) and quickly double-right-click on the video window, you'll get a new menu that will pop up. That menu includes "Picture in Picture" as an option. Selecting that will pop out the video, borderless, from your browser.
You can then move/resize and change the video location to fit anywhere on your screen that you want. You can now minimize the browser entirely and keep your interface clutter-free, while the video continues to play in its own window.
I tested this on Firefox, Chrome and Safari on both Windows and macOS, and it works the same on both environments. The catch here, is if you double-right-click too slow, you'll get your browser's own right-click options menu, and not the one you're looking for. Here are 3 small screenshots showing how this works in each browser type:
Safari on macOS
Firefox on macOS, Windows 10
Google Chrome on macOS, Windows
Once you've selected this option from the double-right-click menu, you'll get a pop-out window you can move around and resize. Combining that with the above article describing the use of FancyZones, you should be able to snap that video frame into any space on your desktop that you want.
There's a small catch with using this approach: The controls to move ahead or back in the video (the timeline slider) are still in the original tab you undocked the window from. You can Pause and re-dock the floating window, but you can't move forward or back in the timeline from the PiP window, you have to return to your browser tab to do that.
If you're using macOS, you have two options: "Sidecar" and "Helium".
Sidecar is a relatively new feature in macOS Catalina. With "Sidecar", you can use your iPad as a secondary display to your Mac machine. Follow the instructions here to set that up:
Now with the double-right-click option, you can resize and move that video window over to your iPad and watch the content there. Yes, you could also just launch YouTube natively on your iPad and do the same thing. This gives you additional options, and you can resize it to fit on the iPad screen in ways that the native YouTube app cannot do on that device.
Helium is the second choice and is completely free, and available on the Apple App Store.
Here's a brief video describing how to use it:
There's another option, specific to Windows 7 and Windows 10. If you install "Anvir Task Manager", you'll get some new options available to you via right-click menus, titlebar icons and context menus.
I recommend starting with the Freeware version of Anvir but if you like the utility, please consider paying for it and supporting the author's work.
One of those right-click options gives you the ability to set the transparency of the window, from 0% to 100%.
Here's what that option menu looks like on Windows 10:
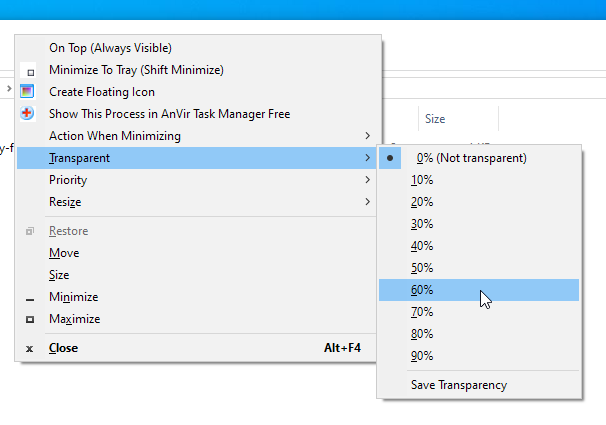
You can right-click the titlebar of your Zwift window, set it to 60% transparency, and run any content you want behind it. If you combine this with a smaller Zwift window, you can shrink that down and play a full-screen movie behind it, with Zwift in front, smaller dimensions, semi-transparent.
Here's a screenshot from when I was playing with this in mid-2016 that shows what you can do:
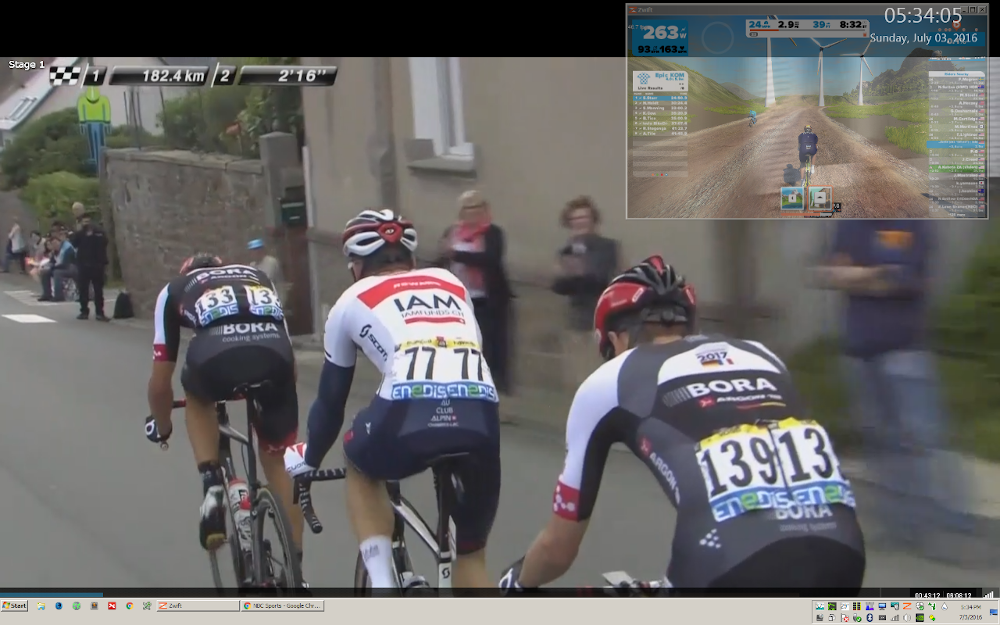
The reason you'd want Zwift in front, is so you can interact with Zwift via the keyboard, since it has primary focus, for those all-important RideOns you'll be giving everyone you ride with!
I hope that gives you more options you can use to consume more than just Zwift while you Zwift. Now get out there and #RideOn!
- Printer-friendly version
- Log in to post comments
- 4709 views