For many of us with larger displays we use with Zwift, including a projector or large-screen, 4k display, running Zwift in a windowed session alongside your favorite movie, YouTube video, Tour de France replay, Google Meet/Zoom meeting or other content can help the sessions go by faster, as we multitask during our rides.
On Windows 10, there are very few good tools to do this, most of them are non-free. With the current pandemic and many people out of work, it's harder and harder to justify spending on small desktop utilities. But you don't have to!
Note: If you're running macOS, there are several alternatives for that platform. I'll write a separate article and create a HOWTO video describing how I use each of these:
In this article, I'll describe how to set up and configure one of the free tools from Microsoft's own "PowerToys" collection and how to use it to auto-launch Zwift in a specific part of your screen, at the size and dimensions you need.
First, you'll need to download and install PowerToys from the link above. It's a free download, and installs quickly. You can use all of the defaults when installing it.
Next, we're going to launch PowerToys, and configure it to support the "Zones" we want to use to display our apps. For now, we'll just create a single zone for Zwift, but you can create multiple different zones to launch your various apps within, for example launching ZwiftPower in a standalone app in another zone while you ride or race.
With PowerToys open, we're going to want to enable the toggle to "Move newly created windows to their last-known zone". This means when an app is placed within a zone, it will remember that placement, so the next time the app is launched, it will correctly place itself within that zone.
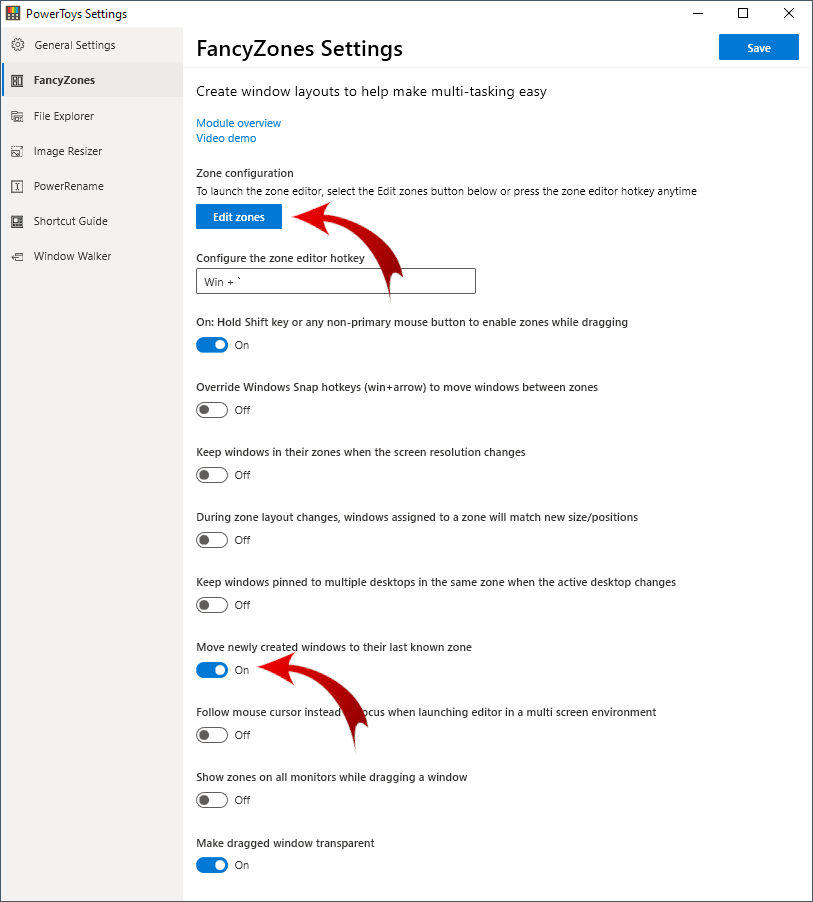
Don't forget to save these settings, by clicking the [Save] button in the upper-right corner of the FancyZones GUI!
At the top of the interface, you're going to click "Edit Zones" to create some regions of your screen to hold the applications you want to contain within those regions.
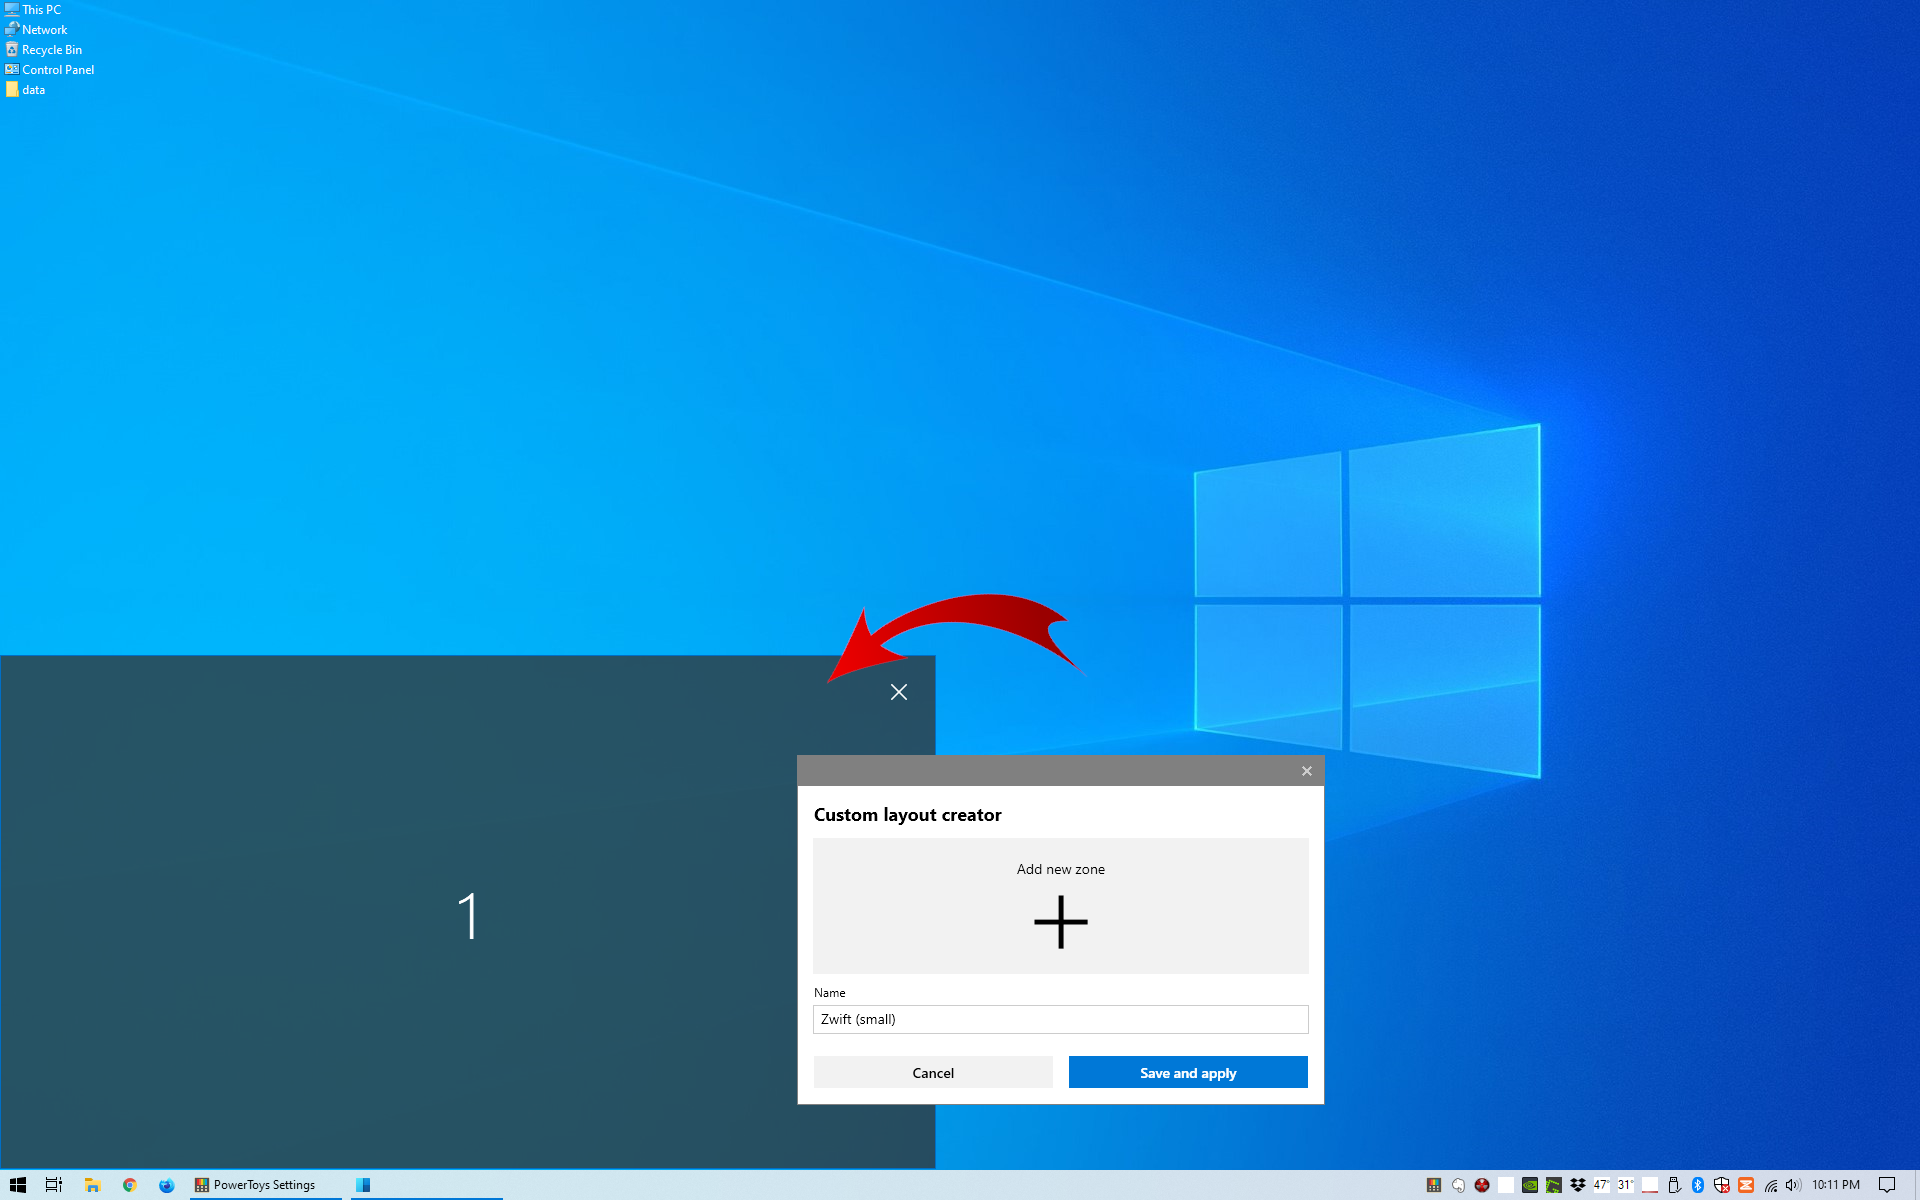
When you click "Edit zones", you'll have the ability to add (+) any number of zones you want on your desktop. Here's a single zone I've added called "Zwift (small)", and placed it in the lower-right corner of my Windows 10 desktop:
Once I've saved this placement, I'm going to launch Zwift one time, and place it into this zone.
First, we want to make sure your setting within Zwift is set to "Windowed" mode, and not "Full Screen" under Settings → Screen Mode, as shown here:

Once that's been set and you've re-launched Zwift, hold [Shift] on your keyboard, and drag the Zwift window into this new zone you've created. When you do, you'll see the transparency will change, and the Zwift window will "snap" into place within the dimensions of this new zone. Now you can close out Zwift, and re-launch it again, and it should automatically jump into this zone when it starts.
If you want to create additional zones for your browser window, media player, eBook reader or other applications, you can do that using the same method. Just create new zones for each new region or application you want to snap into its own region, launch them and drag them into the zones, and you're done!
Here's a quick video showing this working in real-time, on my Windows 10 machine:
Good luck, and #RideOn!
- Printer-friendly version
- Log in to post comments
- 1352 views