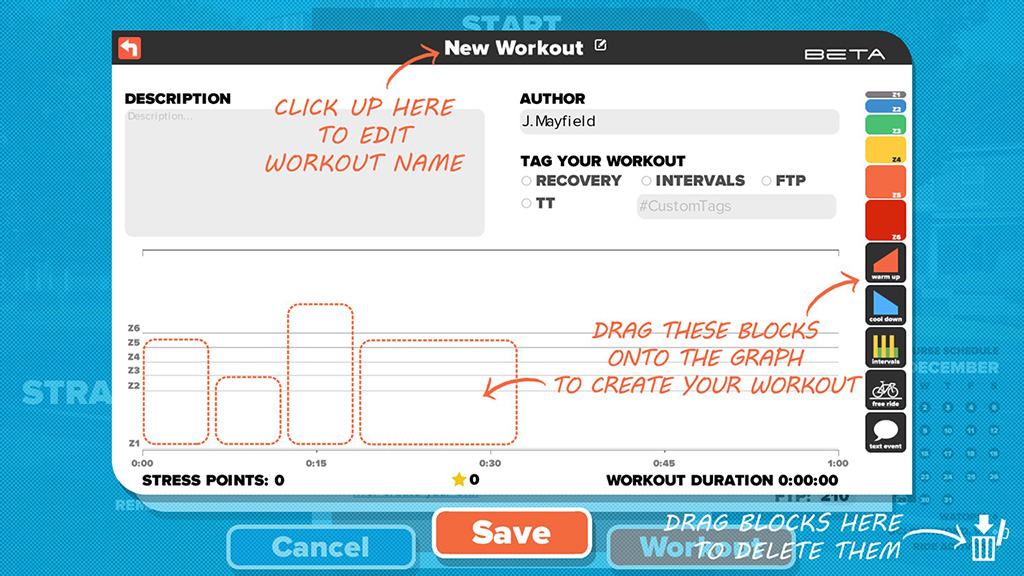
 Shortly before Christmas in 2015, the Zwift communty received a big, earlypresent from Santa (aka Jon Mayfield) in the form of the Zwift Workout Editor. This allows you to drag-and-drop blocks onto a form to create a custom workout that meets your needs.
Within hours, the Zwift Community began pouring over the editor, poking at its every pixel, parsing the created XML files and even creating communitywebsites and Facebook groups to share custom workouts!
The support from Zwift and the community's swift adoption are really a positive testament to how well Zwift is listening to its userbase and creating features the continue to mature and evolve the product.
Such widespread adoption naturally leads to questions!
How do you take a custom workout you've created and share it with others?
How do you take workouts from others and use them yourself?
Read on, fellow Zwifter, all shall be revealed!
Let's start with the easy; taking a workout created by someone else and incorporating it into your Zwift application. If you load up Zwift with its normal configuration, you have the option to select a workout.
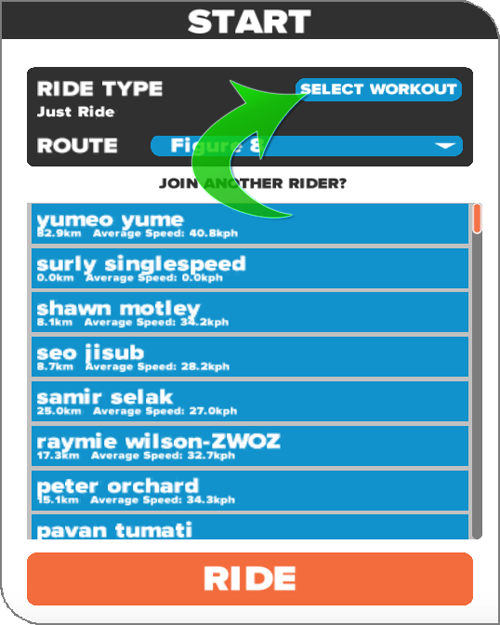
If you choose that option, you can pick any one of dozens of the built-in, canned workouts Zwift has created, or you can build your own custom workout.
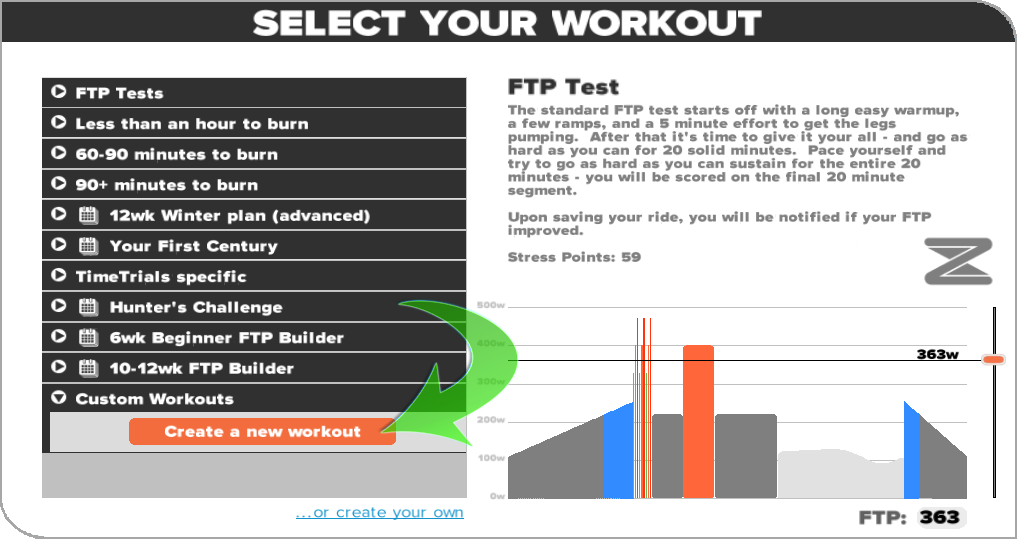
The workouts you create in Zwift are put into .zwo (Zwift Workout) files that reside in your "\Documents\Zwift\Workouts\" directory on both Windows and Mac operating systems. Workouts that you create in Zwift are storedin this directory and are stored in XML format. You can open these with a text editor and see how they're built.
You can find out more about Zwift Workout Mode by reading thevery detailedarticle in James Gill's "Unofficial" (but official" Zwift Community Manual. There's so much more to this feature in Zwift than I can cover here.
But let's talk about how you load acustomworkout into Zwift. First, make sure the Zwift application is closed.
Grab any workout filefrom the Zwift Workouts site and copy it into the Zwift workouts directory ("\Documents\Zwift\Workouts\") using any filename that you want to use. If you intend to use a lot of workouts suplied or shared by others, you may want to pick names that are meaningful when you look at them in the directory while browsing. This is so you don't edit or delete the wrong file by accident, outside of Zwift.
The files you put in here will be parsed and recognized by Zwift. It will also inherit whatever directory structure you create here to organize your files and present that in the Workout Editor UI for you. I created a temporary structure here to display what it looks like for some sample Sufferfest workouts in subdirectories "Hard", "Medium" and "Easy":
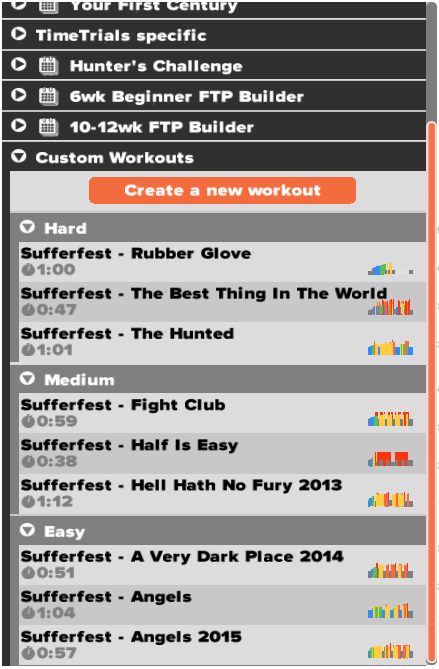
Then I exited Zwift and moved those 3 directories under a directory called "Sufferfest" and created a second directory called "Community" for contributed community workouts. I restarted Zwift, and they showed up as expected under their own heirarchy.
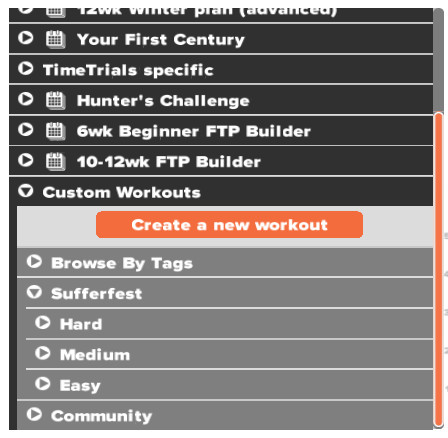
Now that I had a number of workout files stored in the directory, Zwift was able to detect the tags associated with each of those workouts, parsed those and presented that in the view as well. Now it looks like this in the editor:
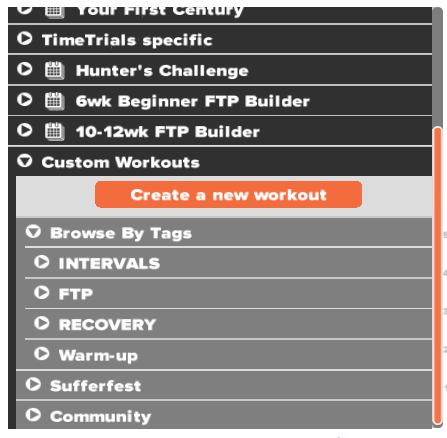
So as long as you're using properly-formatted Zwift workout files of your own design or from the community, and store them in the correct directory, you'll be able to choose them from the Zwift workout interface and ride them.
#RideOn
- Printer-friendly version
- Log in to post comments
- 724581 views