This comes up from time to time in communities where data analytics, screenshot sharing or when using multiple devices to Zwift with, for example using an iPad on your treadmill but a full-size PC connected to a 4k display in your living room.
You might Zwift on one machine or device, but you want to look at your data on another. How do you get your data into multiple places without copying everything around by hand?
- Why would I want to sync data to the cloud?
- What data can you sync?
- Where can I sync my Zwift data?
- What else is there?
Why would I want to sync data to the cloud?
This is a really good question, and one that isn’t always immediately obvious, especially if you only use one machine or device to Zwift. But there’s quite a few benefits to synchronizing your Zwift data into “The Cloud(tm)”.
An obvious one from the top, is the ability to create workouts in a desktop or tablet browser, and synchronize them with Zwift’s cloud services, so they’re available to your mobile device, such as Zwift running on an iPhone or Android handheld.
You can create your workouts in a tool like “ZWO Factory”, and drop them into your Zwift Workouts folder, where they’ll be synchronized the next time you launch Zwift, and immediately posted and available to your iOS/Android device.
Another common use of the cloud storage, is sharing workouts between teams or with your personal coach. With the right cloud storage configuration I’m going to describe in this KB, you can have new workouts pushed to you by your team, friends or coach, which will be automatically integrated into your Zwift client the next time you launch it.
This is great for “distance coaching”, where you and your coach work remotely on your training plans. Sometimes that means over video conferencing, talking through your fitness, your goals and your overall training plan. With the global SARS-CoV-2 (coronavirus) pandemic upon us and travel/social gatherings being further restricted, leveraging these tools to help you keep your training a top priority is still possible.
There are plenty of distance coaches taking on clients and helping dozens to hundreds of Zwift riders every day, including those that use Zwift exclusively to help push their clients to greater and greater power and endurance goals. Coach David Lipscomb of CIS Training Systems has been doing this for the last few years with great success.
The last and still important component, is having a backup of your data, in case your main Zwift machine is inaccessible, broken or lost. The next time you log into Zwift on any machine with your account, your workouts and training plans will instantly become available to you again.
It is “cloud” after all, so the sky is the limit, right? Well, mostly. Many cloud services offer a free tier, but to store greater amounts of data, you may need to upgrade your ‘free’ account to one of the various paid tiers. There’s plenty of space for your Zwift data to fit in almost every cloud service provider’s free tier, unless you’re storing mountains of other data in there as well.
When talking exclusively about Zwift, you can store any of the following data into the cloud:
- Workouts (.zwo files)
- Activity Logs (.txt files)
- Activity data (.fit files)
- Screenshots from your activities
Zwift offers their own back-end cloud sync for your Activities and Workouts, but they don’t allow you to access it directly “out of band” as a standard storage service, like your would with something like Microsoft OneDrive or Google Drive or Dropbox (how to use each of these will be described in detail below). The cloud service is accessible via the Zwift API, but that will not be described here.
Where can I sync my Zwift data?
There are a number of places you can sync your Zwift data. Zwift has their own “Zwift Cloud", which will sync your log files and Workouts as objects in their backend cloud services. The data once stored there, is not generally user-accessible, other than through the Zwift client itself. For the developers, this list of files synchronized to the Zwift cloud can be found in the /api/zfiles API endpoint.
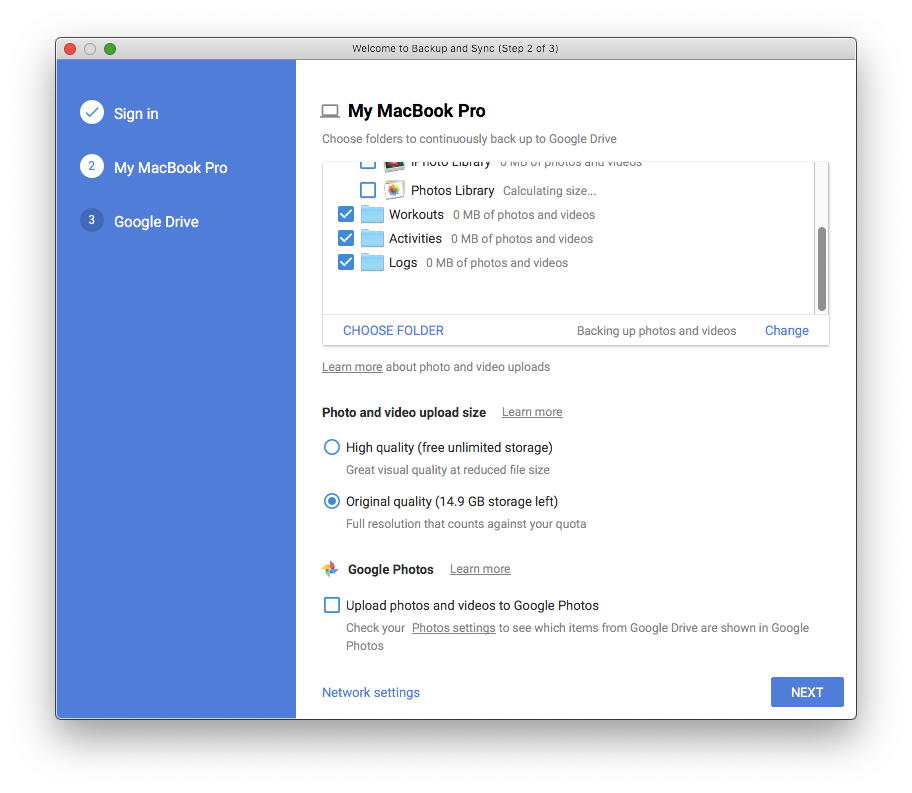
You can also synchronize your Zwift data to Google Drive, if you choose. This requires installing the “Google Backup and Sync” application for Windows or macOS. Installing and configuring that is very straightforward. Once installed, you can add custom folders to the default sync folders, and synchronize that data to any other machines where you’ve installed “Backup and Sync”.
In the example below, I’ve chosen to synchronize my Workouts. Activities and Logs folders to Google Drive:

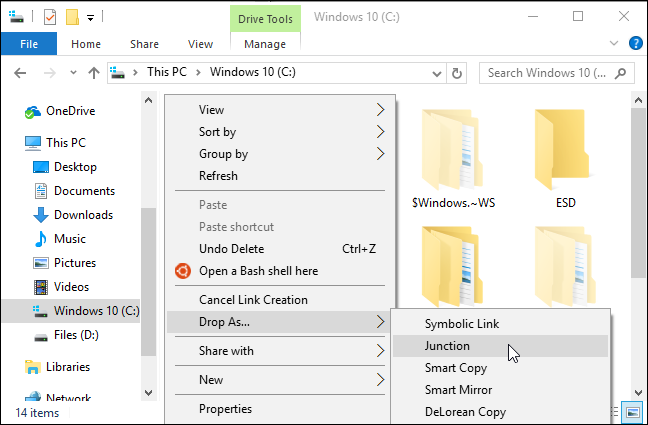
Synchronizing your Zwift data to and through Dropbox is even easier! You can leave your existing Dropbox configuration and setup just the way it is, and just create a new directory inside Dropbox to hold your Zwift data. From there, you can create a symlink on macOS and Linux or use a “Junction” on Windows to link your \Documents\Zwift data into \Dropbox\Zwift.
In my case, I only ever want screenshots I take to get synchronized with Dropbox, so I can touch them up and upload them directly into my Strava activity after my ride is over. To do that, I use the following:
On macOS and Linux:
ln -s ~/Dropbox/Screenshots/Zwift ~/Pictures/Zwift
ln -s ~/Documents/Zwift/Workouts ~/Dropbox/Zwift/Workouts
On Windows:
mklink /J "%USERPROFILE%\Pictures\Zwift" "%USERPROFILE%\Dropbox\Screenshots\Zwift”

Note: The operation of ‘mklink’ is exactly the opposite syntax from the way symlinks are created on Linux and macOS. With the ‘ln’ command, the thing-you-have comes first, and the thing-you-want is second. With mklink, the thing you want comes first, and the thing you have comes second.
If you don't want to use the commandline and prefer something graphical and menu-driven, there's another tool called the "Link Shell Extension" that puts these options inside your right-click menu.
HowToGeek has a great tutorial describing both methods, so I don't have to duplicate that material here.

if you already have a “Zwift” folder inside your “Pictures” folder, rename it to something else before you run the above commands, or you’ll end up with \Pictures\Zwift\Zwift\ which may not be what you want. For screenshots, this puts the primary Zwift folder inside Dropbox, and creates a link outside Dropbox for the reference to it, not the reverse.
Once you’ve done this, any data that is created inside \Pictures\Zwift (such as when taking a screenshot in-game) will automatically get synchronized to all of the machines and devices that are connected to the same Dropbox account.
You can do the same for your \Documents\Zwift\Activities, \Documents\Zwift\Logs and \Documents\Zwift\Workouts folder, to synchronize those to any other devices which may need access to the same data.
For your normal Zwift data, you can reverse that operation if you choose, so the primary is on the local disk, and the symlink/junction exists inside Dropbox, for example:
On Windows:
mklink /J "%USERPROFILE%\Dropbox\Zwift\Workouts" "%USERPROFILE%\Documents\Zwift\Workouts"
In this case, I've created a top-level directory called 'Zwift' inside my Dropbox folder, and then used 'mklink' to create a 'Workouts' junction inside that folder that points back to my "real" \Documents\Zwift\Workouts folder.

Note: synchronization is bi-directional, so any data created in these folders within Dropbox on your other machines, will land on the machine you’re running Zwift on at the moment.
You can use the exact same syntax as described above for creating junctions inside Dropbox to the Zwift folders outside Dropbox, for your OneDrive folder, as shown here:

The beauty of this configuration is that you can have multiple junctions in each cloud service, and the data will be synchronized to each of them at the same time. If you take screenshots in Zwift and are a Dropbox and OneDrive user, those screenshots will be replicated to both services. This is great for resiliency, but also for sharing with different people who may not have access to one or the other services.
OneDrive isn't limited to just Windows any longer. You can also get a OneDrive client for macOS on the App Store. Configuration is relatively the same, with the exception of using symlinks ("man ln" for help) instead of junctions ("mklink /?" for help).
If you use a Mac for Zwift, connect your OneDrive account using the above client and symlinks, you can get all of your Zwift data replicated to your Windows machines where it can be accessed there in real-time.
On Linux:
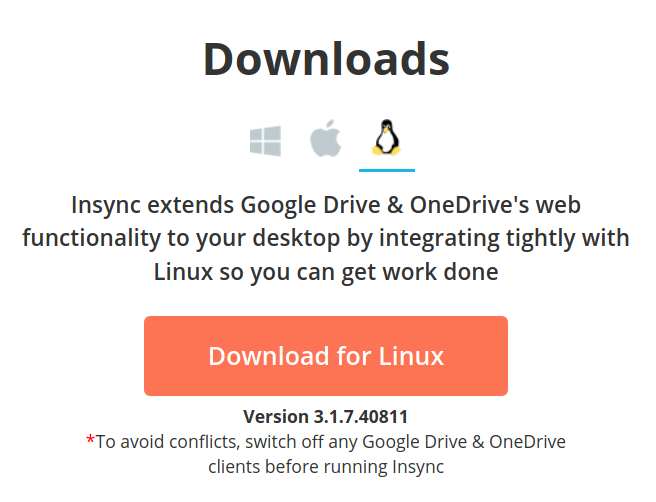
This is one of the places where Linux isn't left out of the party. There's a client for Linux that works with both Google Drive and Microsoft OneDrive, called "InSync", and you can use that on your Linux machine to have the data replicated there as well.

If your main data analytics platform is Linux, or you want to use Gimp to touch up those screenshots or create workouts natively on Linux, this is a great way to get that data over from your Mac or Windows environments. Since Zwift doesn't yet have a native Linux client application, it's left doing the post-activity analysis and post-processing.
There are some other great tools to use with your Zwift activities which can further enhance the usefulness of that data. One popular service is called "IFTTT", which stands for "If This Then That".
IFTTT takes an incoming object and sends it to another outgoing service or object. For example, receiving an email, and storing the attachments from that email into Dropbox. Or receiving a screenshot and attaching it to a Trello card. There are thousands of combinations and hundreds of services it supports.
In the case of Zwift and the use of cloud storage and services, you could create an IFTTT recipe that detects when a new workout lands in your shared Zwift Workouts folder from your coach, and automatically sends you an SMS alert or generates a Google Calendar entry to begin that workout.
If a new screenshot is created in one of your Google Drive, Dropbox, OneDrive folders, you could have that automatically posted to Instagram in real time. There are so many possibilities for this, and IFTTT's usefulness extends well outside the world of Zwift.
I use this in my day job hundreds of times per-week for various roles and workflows and for some home automation tasks to turn on various IoT devices in my home through my Amazon Echo device's voice inputs ("Alexa, turn heat up to 65F")
There's one last tool that gets a good mention, "FreeFileSync", which works across all platforms. This tool is a cloud-neutral tool which can synchronize data from any sources to any sources on a single machine. If one of those sources was local, and the other was a cloud service for example, you could synchronize that local folder to your cloud folder and let the cloud service sync agent do the work of replicating that data up to the cloud for you.
Here's a great, quick tutorial/intro video on FreeFileSync on YouTube:
Well that should get you started. Remember that you get to choose where your data goes, how it gets there and how you sync it.
Good luck, and #RideOn!
- Printer-friendly version
- Log in to post comments
- 1163 views