
I've been asking for this ability to be built into Zwift since mid-2015, and now it's finally possible!
I do a short, 10km, weekly time-trial during the season with one of the cycling clubs I ride with. I wanted to be able to practice it during the winter to bring my times down further before next season. Now I can!
Now you too can take a real-world ride you've done on your bike and convert it to a workout you can ride directly on Zwift. Here's how:
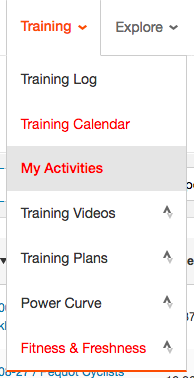
First, log into Strava and go "Training" → "My Activites".
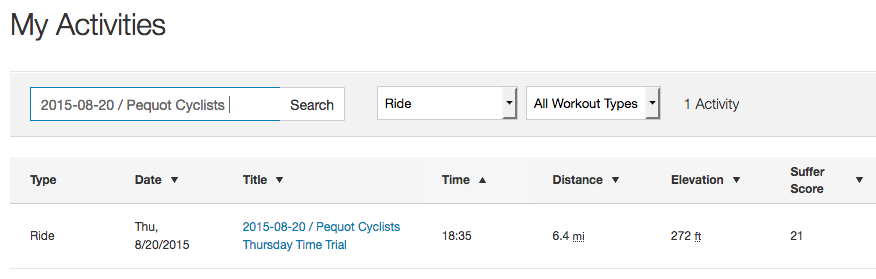
From the search, locate your specific real-world activity. In my case, its my weekly TT ride:
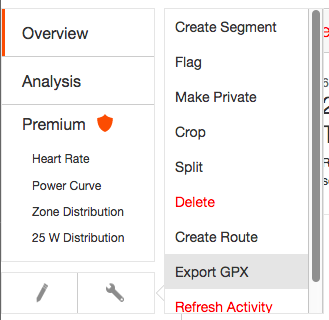
Open up the activity and on the left side of the activity, click the little wrench icon. A menu will pop out and from that menu, you want to choose "Export GPX":
Save that GPX file somewhere on your system so you can find it later.
If you're have a .fit file for your activity, you can use any number of online tools to convert that to a clean, validated GPX file. I've successfully used "Garmin Connect" to do exactly that, by uploading my activity using a .fit file, and immediately downloading it as a GPX file.
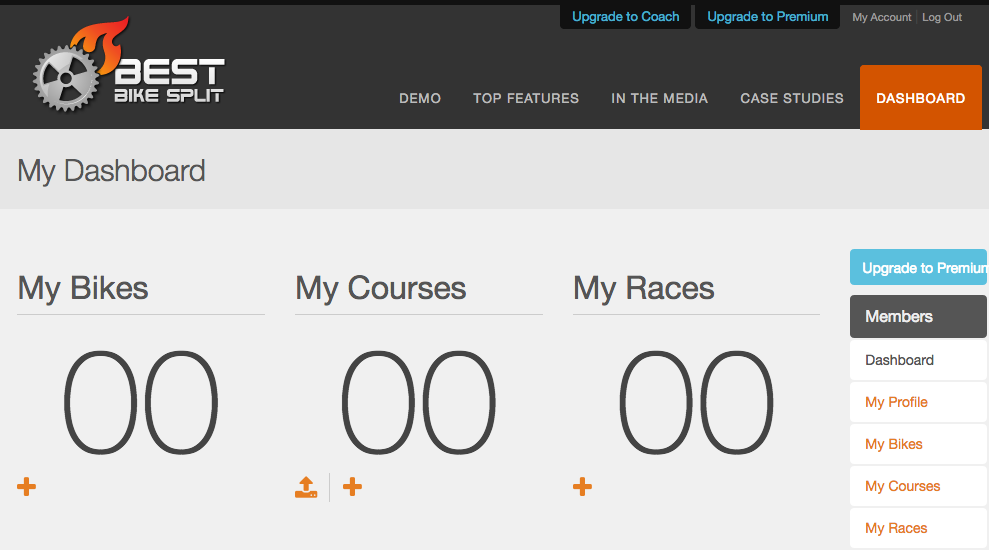
Now, head over to BestBikeSplit and log in (or create a free account if you don't already have a login), and go to your Dashboard.
Unless you're a regular user of the system and have created bikes, courses, races and activities, you should see a 'blank' dashboard, with no bikes, no courses and no races:
Click on "My Races" on the right-side menu and you'll see something that looks like this:
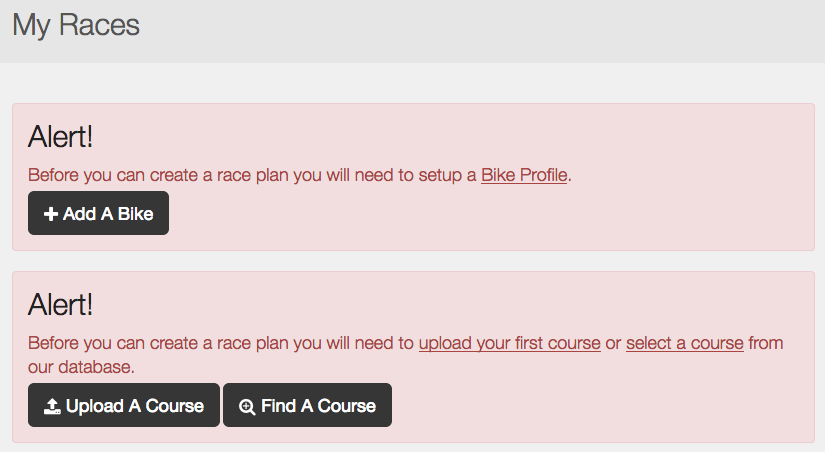
Click on "Upload A Course" on the lower warning dialog. Or, if you want to, set up a "Bike Profile" first by entering your specific bike's data, and then go back to "My Races" and choose "Upload A Course".
From here, you can upload the GPX file you downloaded from Strava, or if your bike computer supports its own GPX file, you can just use that instead of the one from Strava, and drop it onto the landing pad you see here:
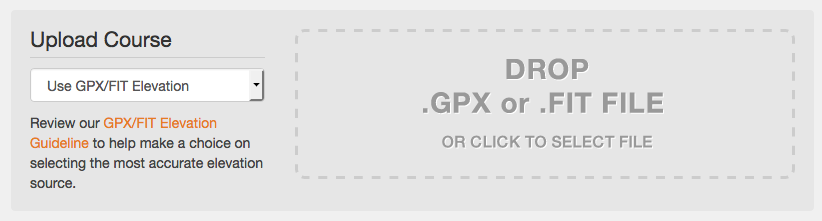
There are two options on the Upload screen, depending on whether you trust Strava or your bike computer to have the correct elevation.
Most people can just accept the defaults, but if you don't trust the elevation data within your GPX file, choose "Use Corrected Elevation" from the dropdown.
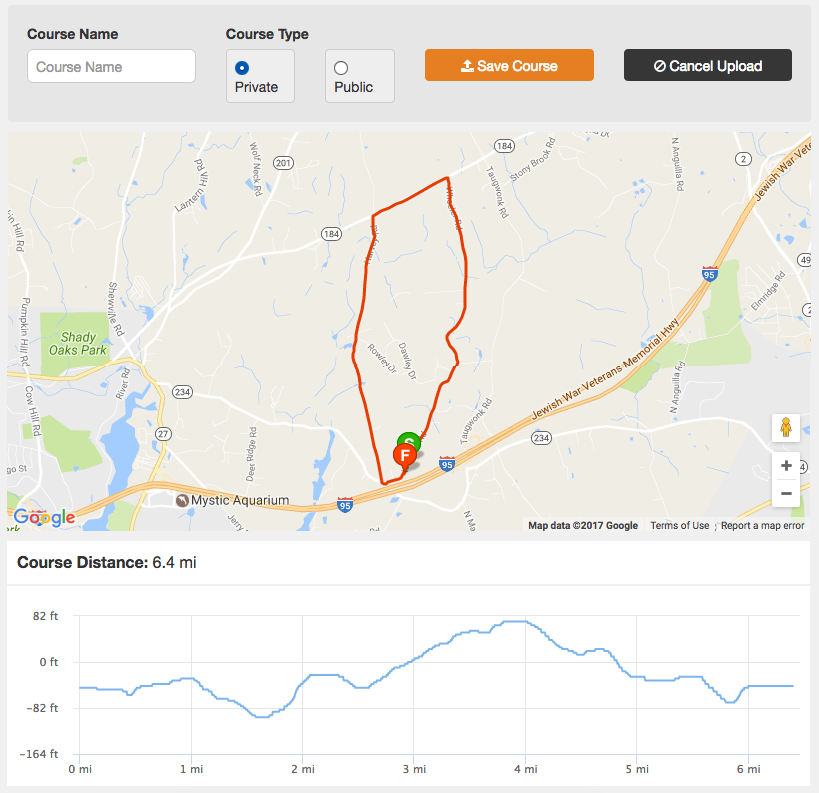
Give the system a moment to process the uploaded file, and when complete you should see something that looks like this:
If you got this far, great work! You're almost done!
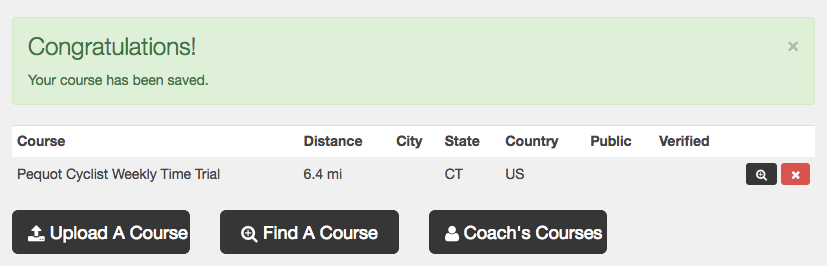
Give your course a name at the top, and click "Save Course". Your new course should now show up in your list of "races":
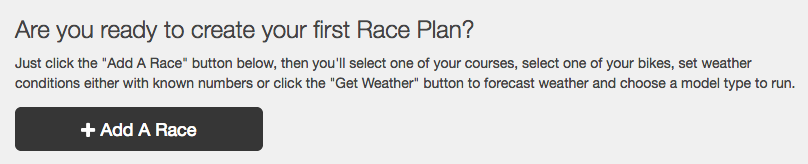
Now click "My Races" on the right side again, and click "Add a Race".
If you don't see this, and see a warning prompt to add a bike, go ahead and do that, and be as accurate as possible when configuring your components (wheel size, width, dish, weight, etc.).
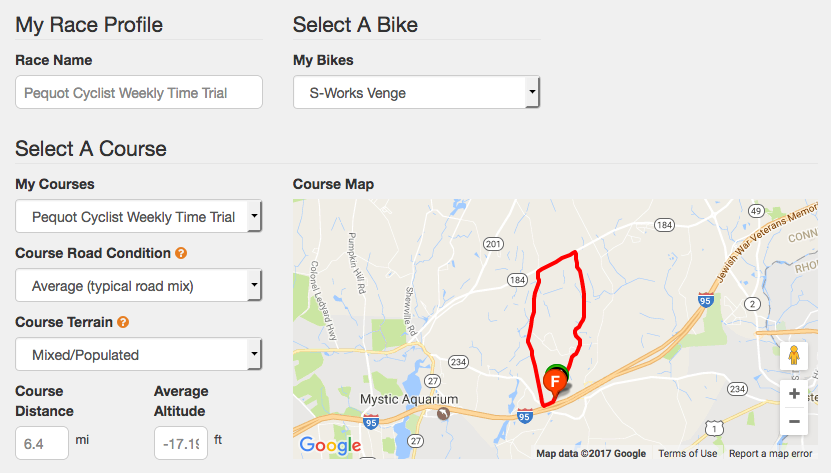
Give your Race a name, and select the bike you created from the dropdown, and then select the Course you just uploaded from the course dropdown, and fill out all of the other data.
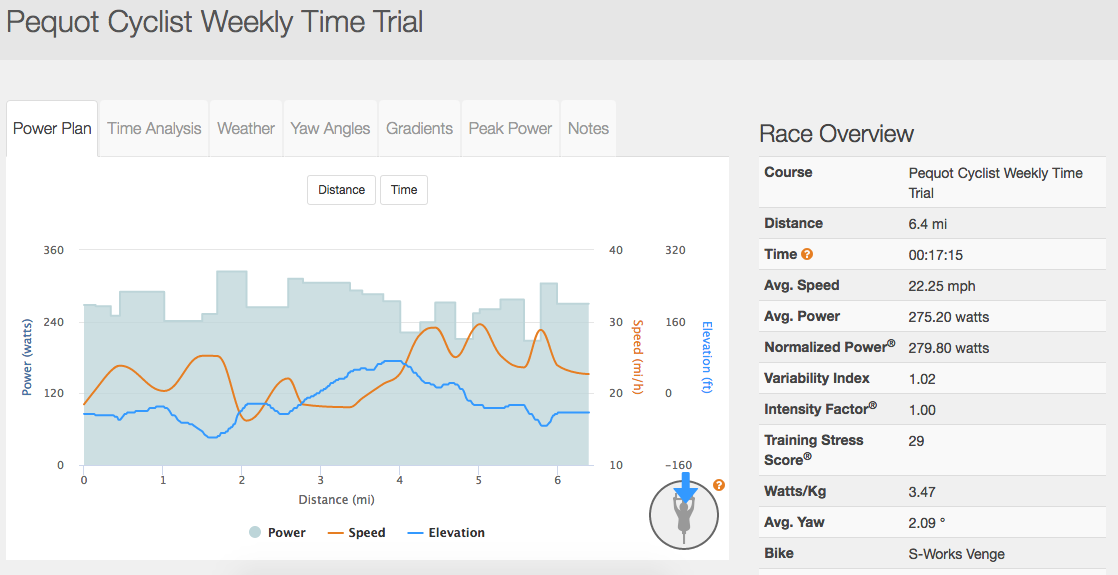
Scroll all the way down to the bottom of the page and click on "Add Race Plan". Once the system processes your Race Plan, you should see a summary page that looks something like this:
Now if you scroll down a little bit, on the right side, you'll see a number of file download options:
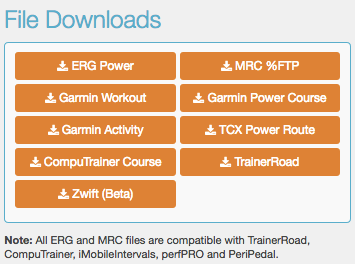
Choose "Zwift (Beta)" from the list, and download your "race" in Zwift's custom .zwo XML format. Save that file somewhere safe that you can locate, as you'll be using it in a moment.
In a file browser of your choice (depending on your OS: Windows Explorer for Windows, Finder for Mac OS X/macOS or iMazing for interacting with iOS devices), navigate to \Documents\Zwift\Workouts.
If you want to organize your workouts, you can create subdirectories in your Workouts folder to build a heirarchy, which Zwift will read and treat as "categories" inside the Workout section of Zwift. I keep mine very organized for precisely this reason, broken down by the 4 cycling clubs I ride with. Feel free to organize them however you wish.
Simply copy the .zwo you downloaded from BestBikeSplit into this directory, or a subdirectory therein.
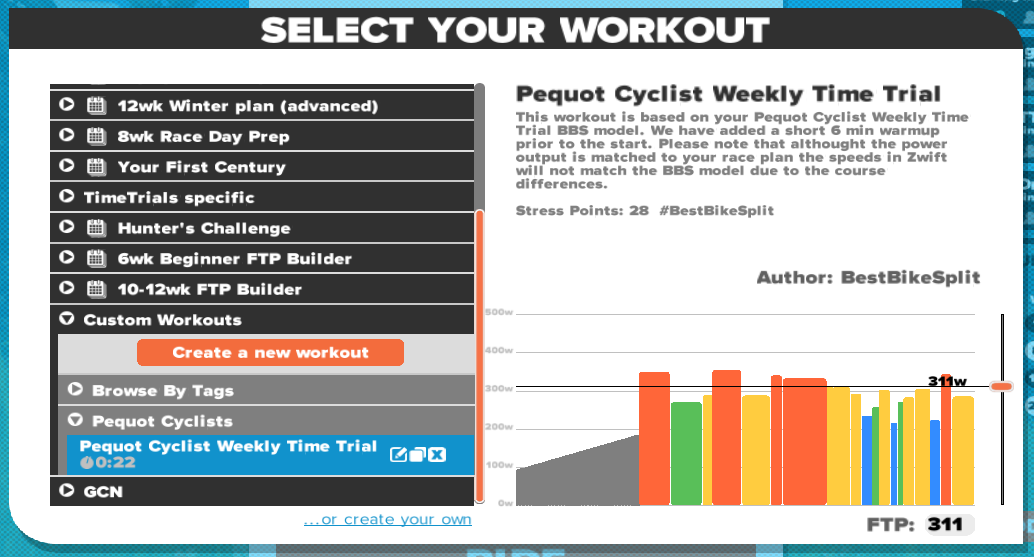
Launch Zwift as you would normally, and go to the Workouts section from the drop-in menu. You should see your new workout there in the list at the bottom:
That's it! Now you can ride that workout with your smart trainer and it should perfectly simulate the real-world effort you need to build on those improvements!
#RideOn!
- Printer-friendly version
- Log in to post comments
- 47590 views